Friday 21 December 2018

AN INTRODUCTION TO MACHINE VISION SYSTEMS

company logo

Machine vision is the incorporation of computer vision into industrial manufacturing processes, although it does differ substantially from computer vision. In general, computer vision revolves around image processing. Machine vision, on the other hand, uses digital input and output to manipulate mechanical components. Devices that depend on machine vision are often found at work in product inspection, where they often use digital cameras or other forms of automated vision to perform tasks traditionally performed by a human operator. However, the way machine vision systems ‘see’ is quite different from human vision.

THE COMPONENTS OF A MACHINE VISION SYSTEM CAN VARY, BUT THERE ARE SEVERAL COMMON FACTORS FOUND IN MOST. THESE ELEMENTS INCLUDE:

  • - Digital or analog cameras for acquiring images

  • - A means of digitizing images, such as a camera interface

  • - A processor
Industrial Machine Vision System
Credits : freepik.com
When these three components are combined into one device, it’s known as a smart camera. A machine vision system can consist of a smart camera with the following add-ons:
  • - Input and output hardware

  • - Lenses

  • - Light sources, such as LED illuminators or halogen lamps

  • - An image processing program

  • - A sensor to detect and trigger image acquisition

  • - Actuators to sort defective parts

HOW MACHINE VISION SYSTEMS WORK

Although each of these components serves its own individual function and can be found in many other systems, when working together they each have a distinct role in a machine vision system.

To understand how a machine vision system works, it may be helpful to envision it performing a typical function, such as product inspection. First, the sensor detects if a product is present. If there is indeed a product passing by the sensor, the sensor will trigger a camera to capture the image, and a light source to highlight key features. Next, a digitizing device called a framegrabber takes the camera’s image and translates it into digital output, which is then stored in computer memory so it can be manipulated and processed by software.

In order to process an image, computer software must perform several tasks. First, the image is reduced in gradation to a simple black and white format. Next, the image is analyzed by system software to identify defects and proper components based on predetermined criteria. After the image has been analyzed, the product will either pass or fail inspection based on the machine vision system’s findings.

GENERAL APPLICATIONS

Beyond product inspection, machine vision systems have numerous other applications. Systems that depend on visual stock control and management, such as barcode reading, counting, and store interfaces, often use machine vision systems. Large-scale industrial product runs also employ machine vision systems to assess the products at various stages in the process and also work with automated robotic arms. Even the food and beverage industry uses machine vision systems to monitor quality. In the medical field, machine vision systems are applied in medical imaging as well as in examination procedures.

TO KNOW MORE ABOUT INDUSTRIAL MACHINE VISION SYSTEM CONTACT MENZEL VISION AND ROBOTICS PVT LTD CONTACT US AT (+ 91) 22 67993158 OR EMAIL US AT INFO@MVRPL.COM


Monday 23 April 2018

DEMAND FOR NEAR INFRARED IMAGING IS HEATING UP


Near infrared (NIR) imaging is growing in demand around the globe, typically as a replacement for thermal or far-infrared (FIR) vision for night vision. NIR cameras are able to detect the wavelengths of light directly adjacent to the visible light spectrum. Unlike thermal cameras, NIR cameras still detect photons like a camera in the visible light spectrum, just at a different wavelength. In the NIR spectrum, there are actually more detectable photons at night, which is what makes NIR cameras so valuable for night vision.
But how does better night vision lead to global growth in NIR imaging? And what types of applications are using NIR cameras?

WHAT’S DRIVING DEMAND FOR NEAR INFRARED IMAGING?

According to a recent study1, the market for all infrared devices will be worth $11.36 billion by 2022. The market will grow at a steady compound annual growth rate (CAGR) of 8.32% between 2016 and 2022. Surveillance applications and long-wavelength infrared (LWIR) devices were expected to see the most growth, but NIR devices will still represent a solid portion of this growth.
Technological advances in NIR imaging will be a major driver of growth in the coming years. NIR sensors often have low quantum efficiencies (QE), topping out at 58%2. Recent breakthroughs, such as thicker silicon and extended deep trench isolation (DTI) architecture for increased photon absorption, can bring QEs as high as 90%. This makes them much more suitable for a wide range of applications, especially applications where range and accuracy are vital.

Machine Vision Blog- Near Infrared Imaging
Credit : freepik.com

NEAR INFRARED IMAGING APPLICATIONS – ADVANCED DRIVER ASSISTANCE SYSTEMS (ADAS)

One of the best examples of NIR imaging in commercial applications would be their use in advanced driver assistance systems (ADAS). The U.S. and the E.U. have both mandated that all vehicles have some form of ADAS by 2020, so this technology will proliferate quickly.
When compared to thermal vision, NIR vision is a clear winner. Thermal vision only detects heat. It’s not good at producing crisp, clear images to facilitate semi- or full-autonomy.
NIR vision, on the other hand, is independent of an object’s heat and takes clear images for ADAS to function properly at night. The only technical problem currently facing NIR vision deployment in ADAS is their limited effective range – often less than 600 feet.
Despite this shortcoming, recent technological advances have addressed this problem and NIR imaging is still the best solution for applications like ADAS. 

Demand for NIR imaging will grow around the globe for the foreseeable future. NIR cameras are particularly adept at functioning at night with little to no sources of light and will start making their way into a number of applications like imaging in ADAS systems. 

TO KNOW MORE ABOUT VISION INSPECTION CAMERA BLOG INDIA, AUTONOMOUS SYSTEMS ARTICLES, RESOURCES AND NEWS VISIT MENZEL VISION AND ROBOTICS PVT LTD CONTACT US AT (+ 91) 22 67993158 OR EMAIL US AT INFO@MVRPL.COM


Source - VISIONONLINE.ORG

Thursday 29 March 2018

LENS SEES CLEARLY EVEN THROUGH SHOCK AND VIBRATION


The future depends on monitoring and regulating air pollution, which is an essential step towards creating a cleaner environment.

JESSICA GEHLHAR, VISION SOLUTIONS ENGINEER, AND CORY BOONE, OPTICAL ENGINEER, EDMUND OPTICS

Historically, Industrial and Ingress Protection Ruggedized imaging lenses have addressed many environmental and application challenges. But as imaging systems increase the number of moving elements and as products move through inspection systems faster for higher throughput, these movements require greater calibration and image performance. As applications like factory automation, measurement, robotics and autonomous vehicles continue to expand and develop, the need for Stability Ruggedized imaging lenses will increase along with the progression of the industry.
Each of these applications presents environmental challenges–such as shock, vibration, and contamination–to imaging systems. Unlike lab and observatory setups, which tend to have relatively controlled environments, manufacturing facilities can be rife with environmental operating difficulties.
To address these challenges, ruggedized imaging lenses have a number of features and benefits. But to determine the best ruggedized lens for an application, first let’s clearly define the various ruggedization techniques. 
Industrial Machine Vision lenses Blog India

STANDARD IMAGING

A standard imaging lens can be insufficient in some applications and environments due to the large number of moving parts within the lens assembly, such as the doubled threaded focus adjustment, the multi-leaf iris diaphragms, and their corresponding thumb screws. For example, the thin overlapped iris leaves are especially susceptible to high shock and vibration, which can cause them to easily spring out of place and be damaged. By replacing the iris leaves with a fixed aperture, the survivability of the lens can be greatly improved.
Another component of the lens that may come loose during shock and vibration are the thumbscrews. Although they may not completely fall off, they can be loosened enough that the focus changes, potentially degrading the image quality. On a machine vision inspection system, faulty image quality can increase the potential to reject passing units or pass failing units. Debris and contaminants in the area can compound these effects.

RUGGEDIZATION

Historically, there have been two primary ruggedization techniques to address these environmental difficulties – Industrial Ruggedization and Ingress Protection Ruggedization.

IN AN INDUSTRIAL RUGGEDIZED IMAGING LENS, MANY OF THE MOVING PARTS OF A STANDARD IMAGING LENS ARE ELIMINATED:


  • the multi-leaf iris is replaced with a fixed aperture stop
  • the focus adjustment is replaced with a simple single thread
  • the thumb screws are replaced with set screws.
Industrial Ruggedization prevents many of the unintentional movements and focus shifts described above, and therefore maintains ideal image quality. Industrial Ruggedized imaging lenses can also prevent a user from accidentally changing the focus and iris settings.

In an Ingress Protection Ruggedized imaging lens, the lens assembly is either fully enclosed or sealed with O-rings (or RTV silicone) to withstand environmental contaminants. IP66 or IP67 environmental ratings are the most well known standards for particulate and water resistance.

Enclosures and seals can be especially critical for lenses used to inspect food quality. The lenses must withstand direct exposure to liquids and humidity in such wash down applications.

Many manufacturing, processing, and packaging applications are in unfavorable environments where dust, debris, dirt, adhesives or fluids are commonplace. Ingress Protection Ruggedized imaging lenses are designed to withstand these harsh environments.

STABILITY RUGGEDIZATION

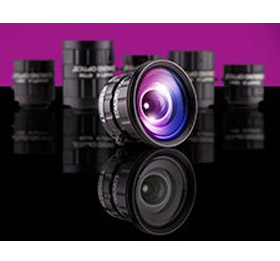
Some of today’s more demanding applications in factory automation, measurement, robotics, and autonomous vehicles levy additional requirements on imaging systems beyond those of Industrial Ruggedization and Ingress Protection Ruggedization. In such situations, there’s another type of ruggedization: Stability Ruggedization. The Edmund Optics TECHSPEC Compact Ruggedized (Cr) Series Fixed Focal Length Lenses are an example of Stability Ruggedized imaging lenses.

While Ingress Protection Ruggedization prevents contamination and Industrial Ruggedization eliminates moving parts, Stability Ruggedization maintains (or stabilizes) optical pointing and positioning even after heavy shock, vibration and temperature change. In a Stability Ruggedized imaging lens, the individual lens elements are glued into place to prevent them from moving within the housing (see Figure 1).

In an optical system, lens elements sit within the inner bore of the barrel. The space between the outer diameter of the lens and inner diameter of the barrel is typically less than 50 microns; decenters of even tens of microns are enough to significantly affect the pointing of the lens (see Figures 2, 3, and 4).

When using a Stability Ruggedized lens, if an object point falls on the exact center pixel, it will always fall there even if the lens has been heavily vibrated; therefore pixel shift is reduced and the image is stabilized.

Even in clean inspection environments with well-controlled robotic movements, there are challenges. Conveyer lines and robotic systems move at higher speeds and handle heavier products than ever before. Vibration comes from operation speeds and weight of the objects, or by the lines and systems located next to equipment. These high intensity environments create tough shock and vibration requirements for imaging systems, making the lens performance more critical.

Additionally, users have higher resolution and image quality expectations. As camera pixel sizes become smaller, even slight misalignments in imaging systems become apparent. Pointing and alignment changes that were once unnoticeable with a camera having 5.6 micron pixels may be very obvious with a camera having 1.4 micron pixels either over time or after a strong shock.

Stability Ruggedization is important in applications where the field of view must be calibrated, such as measurement equipment, 3D stereo vision, lenses used for robotic sensing, and lenses used for tracking object locations. These applications often require the pointing to be stabilized to values much smaller than a single pixel.

In 3D stereo vision, two imaging lenses are used to image a pattern that’s been projected onto a 3D object. The two images are then compared to extract the 3D information about the object, but to do this the angle of the two lenses and field of view must be well calibrated.

Once calibrated, any shift in the pixel mapping will offset the information in the 3D model, affecting the measurements. Many times these systems experience heavy shock and temperature shifts during shipping or relocation. If the system were to require recalibration for each relocation, it would be costly to send a technician onsite, whereas setting up and calibrating the system once would keep costs down.

Another similar application is distortion calibration. Information is not lost in an imaging system that has distortion – the information is simply moved. Distortion can be mapped or calibrated from your imaging systems to remove it. If pixel shift occurs, the distortion mapped is now incorrect; shifting the distortion calibration map can move your values affecting your accuracy.

Another recent challenge machine vision imaging systems face is an increase in traditional robotic imaging systems crossing over into autonomous systems, along with many embedded vision solutions beyond the relatively stationary conveyer line and robotic setups.

Vision enabled robots rely on imaging systems to know where they are in space. As robots move to perform their task, the constant movement can cause pixel shift, affecting their ability to know where they are and their accuracy. Machine vision is also expanding beyond the final pack-out robots on a line. After products are packaged and boxed up, vision-guided robots can transport and load them on and off of trucks – even the trucks themselves may be autonomous vehicles, guided by many sensors including vision.

Back in the factory and warehouses, there are more autonomous robots, driving or flying around to move products or inspect storage locations. Large distribution centers often carry a variety of goods, inspection and handling systems to handle a variety of weights, sizes, and packaging materials. As industrial machine vision systems make their way outside of typical applications and onto autonomous vehicles, once ‘controlled’ environments, no matter how challenging, are no longer controlled in many ways.


TO KNOW MORE ABOUT INDUSTRIAL MACHINE VISION LENSES BLOG INDIA, AUTONOMOUS SYSTEMS ARTICLES, RESOURCES AND NEWS VISIT MENZEL VISION AND ROBOTICS PVT LTD CONTACT US AT (+ 91) 22 67993158 OR EMAIL US AT INFO@MVRPL.COM


Source - DESIGNWORLDONLINE.COM

Friday 16 March 2018

HOW DANFOSS IXA AND EDMUND OPTICS ARE CREATING A CLEANER ENVIRONMENT


The future depends on monitoring and regulating air pollution, which is an essential step towards creating a cleaner environment.

MONITORING MARITIME POLLUTION WITH OPTICS

Monitoring and regulating air pollution is an essential step towards creating a cleaner environment. Danfoss IXA, a high-tech company based in Denmark, is developing a device called MES 1001, a marine emission sensor based on ultraviolet absorption spectroscopy which monitors the NO, NO2, SO2 and NH3 emissions produced by cargo ships to ensure that they are complying with all environmental regulations. The optical sensor is placed inside the exhaust system of ships, so the involved optics will be exposed to extreme conditions and must be able to withstand temperatures up to 500°C and very high pressures simultaneously.
Danfoss IXA was looking for a partner to develop optics fulfilling their demanding requirements, and in EDMUND OPTICS (EO) they found a partner who was prepared to take on this challenge which went beyond their normal capabilities. EO created custom test beds for verifying the unique requirements of the sensor, which enabled EO to develop a robust system to meet Danfoss IXA’s specifications.
Danfoss IXA develops sensors and systems for the maritime industry, focusing on energy optimization and the measurement of emission gases. They are a part of the Danfoss Group, a global enterprise which produces a wide range of technologies that address a variety of markets including food supply, energy efficiency, and climate-friendly solutions.
Smokestack emissions from international shipping are a severe problem for human health, contributing to the premature mortality of people all across the world from lung damage and cardio vascular diseases.

Industrial Machine Vision System India

CREATING A CLEANER ENVIRONMENT STARTS AT SEA


The International Maritime Organization (IMO) has recently decided that commercial ships must comply with low sulfur fuel requirements globally by 2020. In addition, the current Nitrogen Oxide emission control area along the North American coastline will be expanded to cover the Baltic and North Seas in 2021. There currently aren’t convenient and reliable ways for the IMO to monitor ships’ emissions and enforce these regulations. A multitude of local and regional initiatives seeking to limit the air emission from ships further underline the fact that the industry needs to adapt to a world where strict emission requirements are part of the game. Danfoss IXA is developing the MES1001, which is a comprehensive marine emissions sensor suitable for accurately measuring a ship’s air emissions in real time.

THE CHALLENGE


Danfoss IXA approached several providers of optical components to jointly design the optical system for the new MES 1001 device. This project turned out to be very challenging due to the extreme high temperature and pressure requirements. High temperatures can cause optics to fail due to melting and thermal stresses, which severely limits the types of optical materials that can be used. High temperatures can also cause adhesives used in the optical assembly to outgas, contaminating the system. The high pressure requirements made the sealing of the optical system critically important. Most of the optics partners faced their limits in terms of design, metrology for these harsh conditions, or working across different continents and time zones.

THE SOLUTION


EDMUND OPTICS (EO), with its global presence and large staff of optical engineers and designers, is always keen to face new challenges. One of the reasons that Danfoss IXA selected EO as a partner is their ability to ramp-up products from prototype to volume production. When approached by Danfoss, EO dedicated R&D and project management resources to developing an optical assembly for the MES 1001, even though EO had never designed systems to work at temperatures as high as 500°C before. EO investigated many different materials and mounting options, recognizing this project as a learning experience and opportunity to expand their capabilities. Custom testbeds for verifying the optical system’s unique requirements were created and proper sealants and optomechanics were identified to allow the assembly to survive these high pressures. The start of that development process was faced with many issues including cracking optics and outgassing adhesives, but by iterating the design process multiple times and researching in different materials these issues were solved and Edmund Optics eventually delivered an optical assembly that could survive the harsh environment inside a ship’s exhaust system. Edmund Optics is proud to be a part of this product which will positively impact the environment and support a global effort to reduce harmful emissions.
Danfoss IXA “greatly appreciated EO’s professional way of involving [them] along the development process as well as their ability to adapt to changing requirements as [Danfoss IXA] learned more about the exact conditions in which the sensor would be used.” During that time Danfoss IXA “found the support from EO’s project managers extremely fruitful and very efficient in bringing the development process to success.”
The robust optical system is a critical component of the new MES 1001 device, which was launched in 2017. It was exciting for EO to work on this cutting-edge technology in such a close collaboration with Danfoss IXA’s skilled research and development team. The MES 1001 will allow the IMO and other organizations to enforce maritime emissions requirements and help lead to a cleaner environment across the globe.


TO KNOW MORE ABOUT INDUSTRIAL MACHINE VISION SYSTEM, AND ROBOTICS, AUTONOMOUS SYSTEMS ARTICLES, RESOURCES AND NEWS VISIT MENZEL VISION AND ROBOTICS PVT LTD CONTACT US AT (+ 91) 22 67993158 OR EMAIL US AT INFO@MVRPL.COM


Source - EDMUNDOPTICS.COM

Wednesday 21 February 2018

OPTIMAL LIGHTING FOR LINE SCAN CAMERA APPLICATIONS


The speed of line scan cameras has greatly increased in the last years. Modern line scan cameras operate with integration times in the range of 15 µs. In order to achieve excellent image quality, in some cases illuminance levels of over 1 million Lux are required. One of the most important criteria for assessing image quality is noise disturbance (white noise). There are various noise sources in image processing systems and the most dominant one is called “shot noise”.
Shot noise has a physical cause and this has nothing to do with the quality of the camera. The noise is caused by the special essence of light, by photons. The image quality depends on the number of photons which hit the object and ultimately on the number of photons which reach the camera sensor.
In a set-up with a defined signal transmission there are three parameters which influence the 'shot noise' when capturing an image:
  •  integration time (scanning speed)
  •  aperture (depth of focus and maximum definition)
  •  amount of light on the scanned object
The choice of lens aperture greatly determines the required light intensity. If, for instance, the aperture is changed from 4 to 5.6, twice the amount of light is required in order to maintain the same signal to noise ratio (SNR) – see fig. 01). By using a greater aperture, more depth of focus is achieved and the image quality is improved due to reduced vignetting effects with the majority of lenses.
Industrial Machine Vision Systems

LIGHT FOR ALL APPLICATIONS CURRENTLY


LEDs are available in various shades of color. You can get them in red, green, blue, yellow or amber. Even UV LEDs and IR LEDs are obtainable. The choice of a specific color and thus a specific wave length can determine how object properties on surfaces with diverse spectral response are made visible.
In the past, red light was often used wherever high intensity was required. However, relevant performance increase in LED technology today usually occurs with white LEDs. These high-performance LEDs are used for example in car headlights and street lamps. The core of a white LED actually consists of a blue LED. Using fluorescent substances, part of the light from the blue LED is converted into other visible spectral ranges in order to produce a 'white' light.
UV-LEDs are frequently used to make fluorescent effects visible. In many cases a wavelength of approx. 400nm is sufficient. UV-LEDs with shorter wavelengths may be suitable for hardening paint, adhesives or varnishes. In comparison to blue or white LEDs, UV-LEDs are less efficient. By focusing through a reflector however this can be improved. IR lighting is implemented for food inspection. Wavelengths of 850nm or 940nm are used. When sorting recyclable material, wavelengths from 1,200nm to 1,700nm are used to identify different types. Here however, IR-LEDs in this range are not as adequate as classic halogen lamps with appropriate filters where beam output is concerned.

KEEP COOL


The small design enables a very short warm-up phase. This circumstance presupposes good thermal dissipation, in order to maintain appropriate working conditions, i.e. temperatures. As a rule: the better the cooling, the longer the LED durability. Apart from durability, LED temperatures also influence spectral behavior (possible color shifting) and general output (luminance).
In systems where precise color reproduction is required, it is recommended to keep the lighting’s temperature steady at a predetermined value. At present, efficient control systems can regulate the LED temperature to within a spectrum range of less than 2°C.
Modern lighting systems, such as the Corona II lighting system developed by CHROMASENS, provide numerous cooling options. This includes passive cooling with thermal dissipation via convection, compressed air cooling, water cooling and ventilation. Active ventilation, compressed air or water cooling are good cooling methods for measuring applications situated in surroundings with high temperatures. By monitoring the temperature of the LEDs and regulating the cooling system, shifts in color reproduction can be completely avoided or at least greatly reduced.

FOCUS ON THE ESSENTIAL


If a flat object at a known and fixed distance is to be illuminated, selecting the adequate focus is relatively simple. Selecting the right lighting is more complicated, if the object is not at a predetermined distance from the light or has no flat surface. In such a case, assuring a permanently sufficient image brightness is a challenge. Here the use of reflector technology facilitates the accumulation of light from a LED (greater coverage angle of the reflected light) and a better light distribution from the depth.
In contrast to background or bright field lighting, focused lighting is normally used for top lighting. Customary lighting systems use rod lenses or Fresnel lenses in order to achieve the necessary lighting intensity. CHROMASENS adopts a novel and completely unique approach. While the use of rod lenses causes color deviations due to refraction, the mirror (reflector) principle developed and patented by Chromasens has no such trouble.
Shiny or reflective materials are a challenge for lighting. Unwished for reflections often appear in the image. In combination with a polarizing filter rotated 90 degrees in front of the camera, these unwanted light reflections can be prevented. When using such filters, certain factors have to be considered. The temperature stability of the filter is one point. In this respect, many polarizing filters can only be used to a certain extent. Another criterion is effectiveness: with such settings, only about 18-20 % of the original amount of light reaches the sensor. The amount of light provided by the lighting must therefore be great enough to minimize noise and yet achieve sufficiently good image quality.

SUMMARY


When selecting the correct lighting for line scan camera applications, following factors ought to be considered:
  • The lense aperture and the light amount significantly influence the signal noise ratio
  •  LED systems offer definite advantages compared to traditional lighting technologies such as halogen or fluorescent lamps + Good cooling ensures long durability, consistent spectral behavior and a high level of brightness
  •  The use of reflectors assures optimal lighting, even from different distances
  •  Color LEDs, UV- and IR-LEDs are extremely versatile
  •  Polarizing filters prevent unwanted light reflection on shiny surfaces. The amount of light provided by the lighting must still be sufficient


TO KNOW MORE ABOUT INDUSTRIAL MACHINE VISION SYSTEMS CONTACT MENZEL VISION AND ROBOTICS PVT LTD AT (+ 91) 22 67993158 OR EMAIL US AT INFO@MVRPL.COM


Source - CHROMASENS.DE


Tuesday 13 February 2018

COAXIAL BRIGHTFIELD LIGHT FOR 3DPIXA APPLICATIONS


Choosing the right illumination for the application is critical for acquiring the high quality images needed for calculating 3D data. We compare the imaging results of a directional coaxial brightfield illumination with a Corona tube light in terms of color image quality and height map for different samples. It could be shown that for material that exhibit considerable amounts of subsurface scattering, coaxial lighting geometry benefits the 3D measurement using 3DPIXA.In practice, it has to be kept in mind that introducing the beam splitter in the light path results in a shift of the working distance of the camera system, and a slight reduction of image quality.

1.INTRODUCTION


An illumination scheme where the source rays are reflected from a flat sample directly into the camera is called a brightfield. With line scan cameras there are two possible ways to realize such a setup: either by tilting the camera and light source such that the angle with respect to the surface normal is the same but opposite direction, or by using a beam splitter. The first method is not recommended as it can lead to occlusion and keystone effects. Thus we want to discuss the brightfield setup using a beam splitter.
Figure 1 shows the principle of this setup in comparison to a setup with a tubelight. The tubelight is the superior illumination choice for a wide array of possible applications. It reduces the intensity of specular reflections and evenly illuminates curved glossy materials. Most of the time the tubelight should be your first choice and only some materials require the use of a coaxial brightfield illumination.
An example as such is material that exhibits strong subsurface scattering, which means that light beams partially penetrate a material in a certain direction, are scattered multiple times, and then exit at a different location with possibly different direction. Resulting from that is a material appearance that is translucent. Examples of such materials are marble, skin, wax or some plastics.
Using tube light on such materials results in a very homogeneous appearance with little texture, which is problematic for 3D reconstruction. Using coaxial brightfield illumination results in relatively more direct reflection from the surface to the camera, as compared to a tube light illumination. This first surface reflection contributes to the image texture; the relative amount of sub-surface scattered light entering the camera is thereby reduced.
There are some specific properties that have to be taken into consideration when using a coaxial setup with a 3DPIXA. Firstly, only a maximum of 25% of the source intensity can reach the camera as the rest is directed elsewhere in the two transits of the beam splitter. Secondly, the glass is an active optical element that influences the imaging and 3D calculation quality. In chapter 3 we have a closer look at these factors and offer some guidelines for mechanical system design to account for resulting effects. Prior to that, we discuss the effects of the brightfield illumination on a selection of a few samples to give an idea when this type of illumination setup should be used.
Industrial Machine Vision Systems in Mumbai

2.COMPARING BRIGHTFIELD AND TUBELIGHT ILLUMINATION


In this chapter we want to give you some impressions of the differences between using a coaxial illumination in comparison to a tubelight using different samples. As a tubelight we used the CHROMASENS CORONA II Tube light (CP000200-xxxT) and for the brightfield we used a CORONA II Top light (CP000200-xxxB) with diffusor glass together with a beam splitter made from 1.1 mm “borofloat” glass.
In figure 2 we show a scanned image of a candle made of paraffin, which is a material that exhibits strong subsurface scattering. With coaxial illumination (right image) the surface texture is clearly visible and the height image shows the slightly curved shape of the candle. In comparison the tube light (left image) contains very low texture and height information could not be recovered for most of the heights (black false colored region). The texture is only visible with coaxial illumination because under this condition the light reflected from the surface is more dominant in the final image than the subsurface scattered light. However, the ratio between these two effects varies with different surface inclinations. The more deviated the surface normal is from the camera observation angle, the less direct light is reflected directly from the first surface. Therefore, texture in the image gets lower. For the candle sample, more than 15° deviation resulted in failure in recovering height information. This can be seen in the right image at the outer edges of the candle.
3Fehler! Verweisquelle konnte nicht gefunden werden.. The substrate area in the tube light image (left) shows low texture, resulting in partially low performance height reconstruction (black points in false-colored image overlay). With coaxial illumination (right image), the amount of source rays reflected back into the camera from the surface of the material is larger than the subsurface scattered light. The image texture is higher and height reconstruction performance improves.
However, if the height of the balls is the focus in the application rather than inspecting the substrate, the situation becomes more complex as the coaxial illumination results in specular reflection on the ball tops. If these areas are saturated, it negatively affects height measurements as well.
The best illumination therefore strongly depends on the measurement task and materials used and can often only be determined by testing. If you are unclear which light source is best for your application, please feel free to contact our sales personnel to discuss options and potentially arrange for initial testing with your samples at our lab.

3.OPTICAL INFLUENCE


The beam splitter essentially is a plan parallel glass plate which offsets each ray passing through without changing its direction. The size of this offset depends on the incidence angle, the thickness of the glass and its refractive index. The thickness of the beam splitter should therefore be only as small as is needed for stability reasons. In the following analysis we assume a thickness of the beam splitter of d=1.1 mm “borofloat” glass.
The result of the beam splitters influence is a movement of the point from where the sharpest image can be acquired in all three spatial coordinates. The change along the sensor direction (called x-direction) leads to a magnification change of the imaging system that is negligible small (<0.4%, with a small dependence on camera type).
The change along the scan direction (called y-direction) only offsets the starting point of the image. If the exact location of the scanline is important (e.g. when looking on a roll) the camera needs to be displaced relative to the intended scan line by
Δy = d*(0.30n – 0.12).
The equation is valid for all glass thicknesses d and is a linear approximation of the real dependency on n, where n is the refractive index of the glass material introduced into the light path. The approximation is valid in the interval of n= [1.4, 1.7] and for all types of 3DPIXAs. The direction of the displacement is towards the end of the beam splitter that is nearer to the sample, so in the scheme in figure 1 the camera has to be moved to the left.
The change of the working distance is different along the x- and y-axis of the system because of the 45° tilt of the beam splitter leading to astigmatism. In y-direction the working distance is increased by
zy = +d*(0.24n +0.23).
As above, the formula is valid for all d and n= [1.4, 1.7]. The change of the working direction along the x-direction is not constant but also changes depending on the position of the imaged point which leads to field curvature. Both astigmatism and field curvature slightly lower your image quality which influences the imaging of structures near the resolution limit. But they should not influence the 3D algorithm as generally only height structures that are several pixels in size can be computed.
Additionally to the optical effects discussed above the beam splitter also changes the absolute height values computed by the 3D algorithm (i. e. the absolute distance to the camera). The exact value of this height change is slightly different for each camera. Generally the measured distance between camera and sample decreases, so that structures appear nearer to the camera than they really are. This change is constant over the whole height range (simulations show 0.2% change) and also constant over the whole Field of View. In summary, relative height measurements are not influenced at all, and absolute measurements are shifted by a constant offset.
As the precise change of the calculated height is not known, the zero plane of the height map can’t be used to adjust the camera to the correct working distance. We advise you instead to set up your camera using the free working distance given in the data sheet and correcting it with Δzy from above.

4.SUMMARY


On certain translucent materials (those exhibiting considerable subsurface scattering of light), using coaxial illumination can result in a significant increase in image texture which greatly benefits the 3D height reconstruction. However, the additional glass of the beam splitter in the optical path of the camera system when using coaxial illumination influences the optical quality negatively. Further, the working distance of the system changes slightly and the absolute measured distances are set off by a constant value. This does not affect relative measurements, which are generally recommended with the 3DPIXA.


TO KNOW MORE ABOUT INDUSTRIAL MACHINE VISION SYSTEMS IN MUMBAI CONTACT MENZEL VISION AND ROBOTICS PVT LTD AT (+ 91) 22 67993158 OR EMAIL US AT INFO@MVRPL.COM


Source - CHROMASENS.DE